Showing posts with label Orange. Show all posts

Monday, 25 March 2013

Terry's Chocolate Orange Cake

This time I adopted my original Terry's Chocolate Orange Cake recipe so I can prepare it in the Zila Cake Mould. When I purchased my mould, this was the cake I had in mind that would be the best with it. It was much easier to to make the cake and I didn't need the gelatine to harden the cream, as this time the cavities hold the cream together.

Terry's Chocolate Orange Cake


For the sponge
190 g self-raising flour
3 tbsp cocoa powder
210 g butter at room temperature
210 g golden caster sugar
1 1/2 tsp baking powder
4 eggs
100 g 70% dark chocolate, melted and cooled

For the cream
300 g soft cheese
zest of 2 oranges
juice of 1.5 orange
3-5 tbsp icing sugar
150 ml double cream

orange food colouring

For the decoration
1 Terry's Chocolate Orange


Heat the oven to 180 C. Coat the 12 slice cake mould with a vegetable fat based release agent spray.

Put all the cake ingredients except the chocolate in a  large bowl. Beat them together with an electric mixer until you have a creamy mixture, then fold in the melted chocolate. Add a little more milk if the mix is too stiff- it should fall easily from a spoon.

Pour the cake mix into the prepared tin and bake in the oven for 25-30 minutes or until the sponge springs back when pressed.


For the filling, mix all ingredients in a big bowl then add the orange food colouring(the amount you need depends on the brand, so use as recommended), mixing thoroughly and put it to the fridge to harden a little.

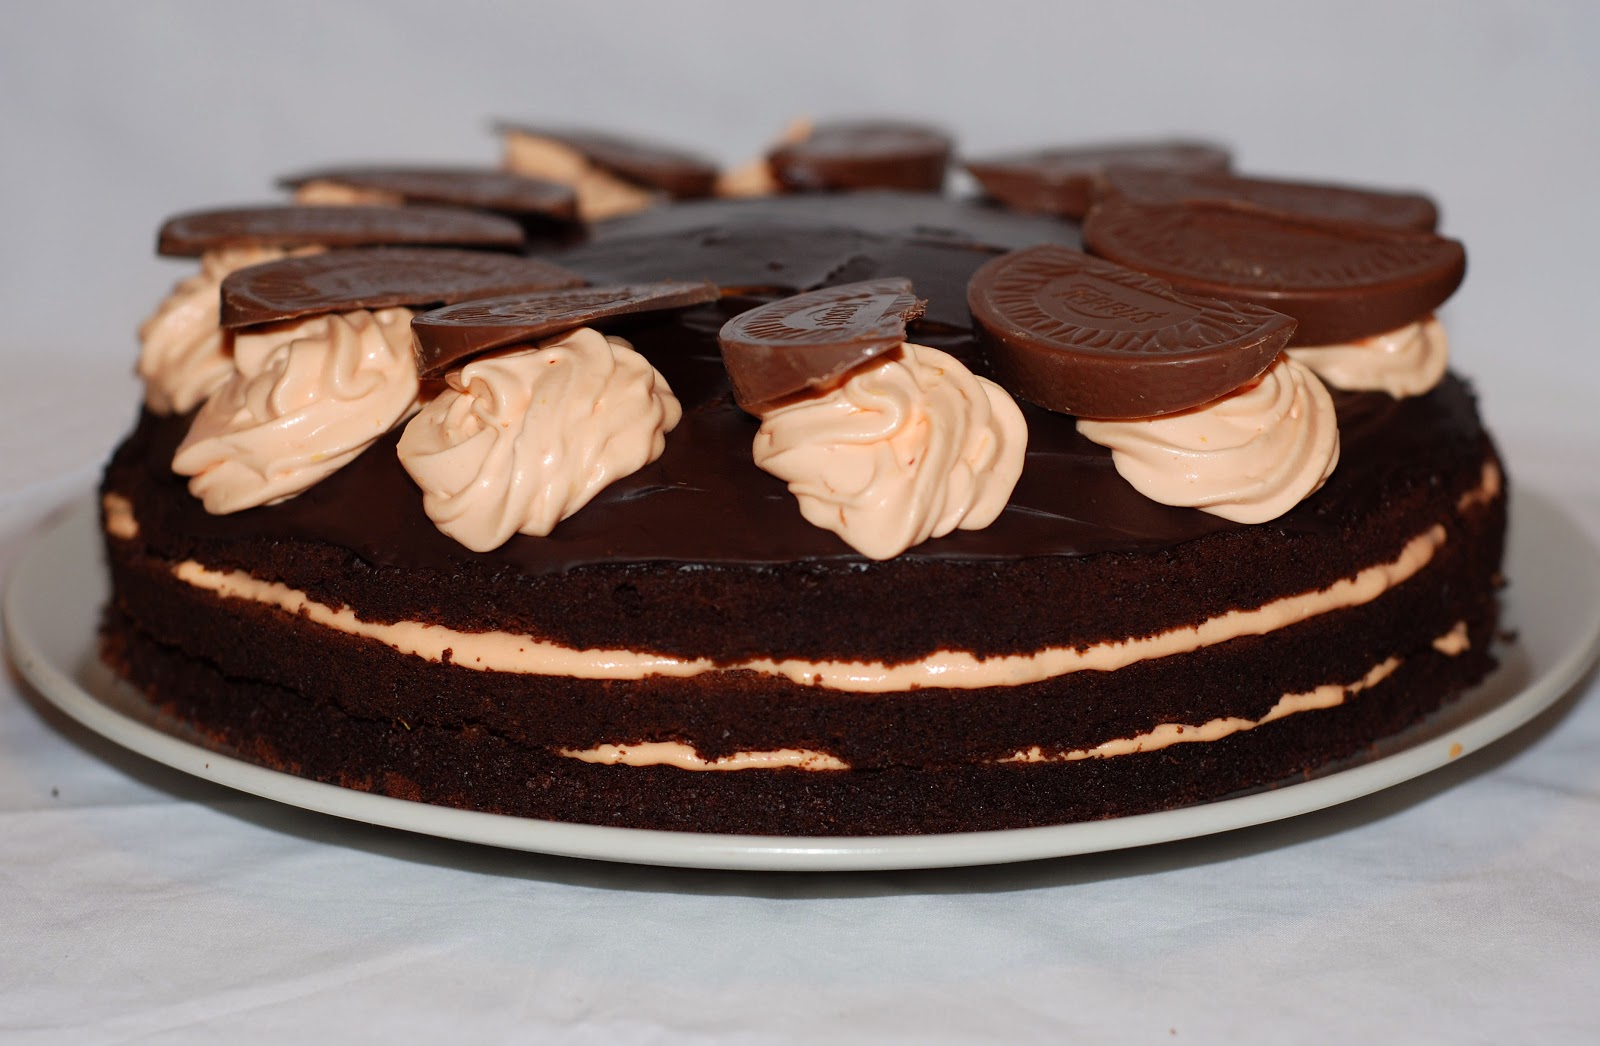
Place the filling into a piping bag with a star nozzle. Pipe the cream into the 12 cavities and place a Terry's Chocolate Orange slice in each cream portion.

Enjoy:) Sorry, I don't have any pictures from the actual slices as I took it into my workplace to  my colleagues to destroy:).

Monday, 12 November 2012

Terry's Chocolate Orange Cake

I offered to bake a cake to our BBC Children in Need Charity bake sale. I choose the cake I made for Halloween as it is sturdy, easy to slice, can be on the cake sale table for long and ok to transfer.......and it is delicious(the main thing). I also love chocolate and orange together, but I slightly altered the look of the cake so it would fit for sale. 
Recently I adapted a new look and prepared the cakes in my new 12 slices Zila Cake mould.
If you want to see the Zila range or buy some, you can do it here: Link to buy Zila Cake Mould


Terry's Chocolate Orange Cake


For the sponge
150 g self-raising flour
3 tbsp cocoa powder
175 g butter at room temperature
175 g golden caster sugar
1 tsp baking powder
3 eggs
1-3 tbsp milk
100 g 70% dark chocolate, melted and cooled

For the cream
300 g soft cheese
zest of 2 oranges
juice of 1.5 orange
3-5 tbsp icing sugar
200 ml double cream
1.5 tsp powdered gelatine
orange food colouring

For the decoration
1 Terry's Chocolate Orange
50 g dark chocolate
3 tbsp milk
1 tsp butter


Heat the oven to 180 C. Butter and base line your 23 cm round cake tin with baking parchment.

Put all the cake ingredients except the chocolate in a  large bowl. Beat them together with an electric mixer until you have a creamy mixture, then fold in the melted chocolate. Add a little more milk if the mix is too stiff- it should fall easily from a spoon.

Pour the cake mix into the prepared tin and bake in the oven for 20 -25 minutes or until the sponge springs back when pressed. Cool the cake than cut in three with a cake leveller.


For the filling, mix all ingredients in a big bowl except the double cream and the gelatine.
Heat the double cream in a heavy based pan to boil. Take off from the heat and add the powdered gelatine and mix well to dissolve any lumps. Cool down the mixture to room temperature  then add to the orange mixture. Work together the two mixture and add the food colouring(the amount you need depends on the brand, so use as recommended) and put to the fridge to harden a little.


When the cake is cooled and the orange mixture is solidish, spread one layer to the bottom sponge, sandwich on top the other sponge layer and spread another layer of cream on top.
For the chocolate icing, melt the chocolate with 3 tbsp of milk then add the butter. Spread on top of the cake, than pipe on the rest of the orange cream.
Finish off with the Terry's Chocolate Orange slices.
Enjoy:)

Ps: if you not familiar with the Terry's Chocolate Oragne, here it how it looks like:

Thursday, 1 November 2012

Halloween Chocolate and Orange Cake

So it is Halloween Night! After work I started baking, and the end result was yummy.... except the cake didn't have time to chill properly, but nobody complained. I used the chocolate sponge form the BBC Good Food Website...and the orange cream is a last minute made up creation.

Halloween Chocolate and Orange Cake


For the sponge
150 g self-raising flour
3 tbsp cocoa powder
175 g butter at room temperature
175 g golden caster sugar
1 tsp baking powder
3 eggs
1-3 tbsp milk
100 g 70% dark chocolate, melted and cooled

For the cream
250 g soft cheese
zest of 2 oranges
juice of 1 orange
3-5 tbsp icing sugar
150 ml double cream
1 tsp powdered gelatine
orange food colouring

For the decoration
50g dark chocolate
black icing
edible icing pen-white


Heat the oven to 180 C. Butter and base line your 23 cm round cake tin with baking parchment.

Put all the cake ingredients except the chocolate in a  large bowl. Beat them together with an electric mixer until you have a creamy mixture, then fold in the melted chocolate. Add a little more milk if the mix is too stiff- it should fall easily form a spoon.

Pour the cake mix into the prepared tin and bake in the oven for 20 -25 minutes or until the sponge springs back when pressed. Cool the cake than cut in half with a cake leveller.


For the filling, mix all ingredients in a big bowl except the double cream and the gelatine.
Heat the double cream in a heavy based pan to boil. Take off from the heat and add the powdered gelatine and mix well to dissolve any lumps. Cool down the mixture to room temperature  then add to the orange mixture. Work together the two mixture and add the food colouring(the amount you need depends on the brand, so use as recommended) and put to the fridge to harden a little.

In the meantime you can prepare the spider...I didn't want the scary one....I am quite happy with a lovely looking spider, so make two balls one should be smaller than the other to create the head. And roll 8 thin "ropes" for the legs. Bend the legs slightly and leave it to dry so it would hold the leg shape for a while after decoration....Draw eyeballs and ...well it is ready.

When the cake is cooled and the orange mixture is solidish, spread one layer to the bottom sponge then sandwich on top the other sponge layer. Spread the remaining of the orange cream on top. Melt 50g of chocolate above boiling water in a bowl and add some double cream if you think it is too thick to pour, then starting from the middle start pouring the chocolate in a spiral movement until you reach the edge of the cake. With a cake tester or any other stick start to draw lines from the middle of the cake to the edge to create the web effect.
Place the spider on top and chill for at least 2 hours.
Enjoy:)

Saturday, 30 June 2012

Fanta Slice/Orange and Curd Cheese Cake

So another Hungarian cake. Although you won't find it in any cake shop, this is truly home baking. It isn't sweet, as the main purpose of the cake to cool you down at summer, when temperatures reaches over 30C...but that doesn't mean, you have to live in a warm country to have this. I made this cake for my workplace for my Birthday so I couldn't slice it up to have a nice picture. I also changed my own recipe as the original filling is with butter, but I try to eat as less calories as possible currently.

Fanta Slice

(Orange and Curd Cheese Cake)

For the sponge
3 eggs
pinch of salt
3 tbsp sugar
3 tbsp plain flour
3 tbsp cocoa powder
50ml vegetable oil
1/2 tsp bicarbonate of soda
1/2 tsp bicarbonate of baking powder

For the filling
250g curd cheese
200ml double cream
1 vanilla pod
3 tbsp icing sugar

For the top
3 oranges(optional, originally we don't have it on the top)
7dl Fanta orange
2-3 tbsp sugar
2 Puding powder-custard flavoured-in polish shop ask for Budyn smietankowym *more on this at Tricks and Recommendations

Preheat the oven to 180C and line a 19X25cm cake tin.
Separate the eggs then with a pinch of salt beat the egg whites until it form stiff peaks. While continuously mixing with an electrical mixer add the egg yolks, then the sugar and the oil(mixing between each addition). 
Sift in the flour, cocoa powder, bicarbonate of soda and the baking powder in two lots, carefully folding in the mixture.

 If you rush this step you can ruin your whole cake. Two typical mistakes: not folding thoroughly and you will have small lumps of flour in the ready sponge, or you mix it too vigorously and you break up the air bubbles in the mixture(that you created with the mixer) and it won't rise at all in the oven.
Bake for 15-20minutes, or until the inserted wooden skewer comes out clean. Leave to cool then take it out from the pan.

For the filling
Whip the double cream until stiff peaks then add the curd cheese, vanilla seeds and the icing sugar and mix it again. If you prefer the more sweet cake than the sourish refreshing one, add 3 more tablespoon of icing sugar into the mix.


For the top, peel the oranges, cut them half then slice them to 0.5cm pieces. 
Heat 5dl Fanta in a heavy based pan, with 2 tbsp sugar until boiling, meanwhile in a small bowl mix the Puding powder with the remaining of the Fanta to avoid lumps in the liquid later on. Pour the mixture into the fanta while stirring constantly. Within 1-2minutes it should reach a thick creamy, puding texture. Take off the heat and stirring occasionally to cool it down to room temperature just before to set.

To assemble
Line your tin with baking paper. The paper should be higher than the side of the cake by at least 3cm. When the cake will be ready you need that 3cm handle to lift the cake out from the pan.
Place your sponge in the tin then spoon over the curd cheese filling and slightly press it down with a spoon. We want to achieve a stiff, levelled filling with no gaps on the sides. If you leave some gaps on the sides the jelly will go all the way to the bottom.

Even if your sponge shrink a little and it isn't covering the bottom side to side, fill up the gap with the filling. Arrange the orange slices on top and pour your Fanta mixture on top.
Rest the cake in the fridge for at least 3hours preferably over night.
When it is ready, just lift the cake out of the tin, slice and serve.


Tuesday, 5 June 2012

Orange Biscuits

This is a stress free, very simple recipe. I wanted to have a great biscuit recipe that I can use with my biscuit press and easy to make after work. Then I found this Hungarian recipe. Easy to make, quick and the biscuits are great even after a week(I didn't have the chance yet to test it for any longer period:))

Orange Biscuits


For the biscuits

130g butter
130g sugar
1vanilla pod
2 tbs orange zest
2 tbs orange liqueur or orange juice
1 egg
250g plain flour


Preheat the oven to 180°C
Cream together the butter and the sugar until light and fluffy with a mixer.
Add the vanilla seeds, orange zest, orange liqueur/juice and egg and mix again.

Fold in the flour then spoon the mixture into the biscuit press and make the biscuits until you have paste left. 

Bake for 15 minutes or until golden brown.

Hint and tips:
I tried the biscuit press before with no luck. The secret to the biscuit press: you have to use ungreased baking paper, otherwise the mix won't stick on to it. I couldn't find any, as all modern baking papers are "non stick" therefore their coating prevents the baked goods to stick to it-exactly the opposite what you want in this case.
My trick is to put the baking sheets on a tray into the oven and bake them for 30 minutes on 180°C. After a while the non stick coating will disappear and your paper will be a bit stiff and matt-after this "treatment" your baking paper is ready to use with biscuit press.

Friday, 1 June 2012

Chocolate and Orange Mousse Cake

Last year the BBC presented its best series so far: The Great British Bake Off. In the series was Mary-Anne Boermans, whose creativeness just stuck with me. This is her recipe, but I slightly adjusted the Joconde sponge quantity as for me it was just too much....my sponge was  too thick therefore I couldn't bend it...it broke into pieces.
I made this cake for my husband's birthday party but I used the dreadful supermarket's food colouring....as the stripes meant to be orange.........and I clearly hasn't achieved that effect (at that time I tough it was my fault), but the cake was divine.
Half of the Joconde décor paste will be left over, but necessary to make this amount to create the waves....but the good news is:you can freeze it and keep it in the freezer for a month. I did it and when I made my Individual Strawberry Cakes, they were like a new batch of paste.

Chocolate and Orange Mousse Cake


Joconde décor paste
100g unsalted butter, softened
100g icing sugar
100g egg whites
110g plain flour
orange food colouring
2tbs melted butter

Joconde sponge
135g egg whites, at room temperature
20g granulated sugar
170g ground almonds
170g icing sugar, sifted
4 large eggs
30g plain flour
30g cocoa powder
65g clarified butter, melted


Chocolate and orange mousse
1 orange, zest and juice
1 tsp powdered gelatine
175g plain (60%+) chocolate, broken into pieces
2 large eggs, separated
300ml double cream, whisked to soft peaks

To decorate
300ml double cream


Preheat the oven to 220°C, 200°C Fan
Line two 45cm x 30cm (half sheet) baking trays with baking parchment and brush with the melted butter.

Make the joconde paste:
    • Cream the butter and sugar until light and fluffy then gradually add the egg whites, beating continuously.
    • Fold in the sifted flour then add the food colouring.
    • Spread the paste on the buttered baking paper and using a cake comb create a pattern through the coloured stencil paste. To help visualize I found this in a book...Hope it helps , it certainly helped me:(although I used baking paper not Silpat like on the pictures)

  • Make the joconde sponge:
    • Whisk the egg whites until they form soft peaks.
    • Add the granulated sugar and continue whisking until stiff peaks are formed.
    • Scrape the meringue mixture into a bowl and cover with cling film to prevent the meringue collapsing.
    • Beat the almonds, icing sugar and eggs in the bowl for 5 minutes until the mixture is light and fluffy.
    • Turn the speed down to low and mix in the flour and cocoa powder.
    • Gently fold in the meringue mixture using a large spatula.
    • Put the melted butter in a small bowl and mix in a cupful of the sponge batter. Pour this back into the mixing bowl and gently fold into the rest of batter.
  • Remove the baking trays with the decor paste from the freezer.
  • Divide the batter evenly between the two baking trays, spreading it smoothly over the decorations and into the corners ensuring it is level. An offset spatula is useful for this.
  • Bake for 5-7 minutes, until the sponges are cooked and springy to the touch and have shrunk away from the edges of the pan.
  • Turn out by covering the sponge with a sheet of parchment then flip the baking tray over onto the work surface. Peel off the paper to reveal the pattern, and lay it lightly on top of the sponge. Leave to cool.
  • When cooled, cut strips of sponge to line the sides of the cake tin, ensuring the pattern is facing outwards against the sides of the tin. Cut a circle of sponge to line the base and lay it patterned-side down, in the bottom of the tin. Cut a second circle to make the top of the cake and set aside.

  • Make the mousse:
    • Pour the juice from the orange through a fine sieve into a small bowl and sprinkle over the gelatine. Set the mixture aside for three minutes then place the bowl over a small pan of simmering water, taking care the bottom of the bowl does not touch the water, and stir gently until the gelatine has dissolved.
    • Place the chocolate in a large bowl and melt it in the microwave, stirring every 45 seconds.
    • Mix the orange zest and egg yolks into the melted chocolate, then stir in the gelatine mixture and fold in the whipped cream.
    • Whisk the egg whites until they form stiff peaks then gently fold into the chocolate mixture. Pour the mousse into the tin, level the surface and place the remaining sponge circle on top, pattern uppwemost and chill in the fridge for at least two hours.
  • To decorate:
    • Release the sides of the springform tin and peel off the acetate/silicon. Transfer to a serving plate .
    • Whip the double cream to stiff peaks (be careful not to over-beat) and pipe swirls around the edge of the mousse cake(or cover the whole cake like me).

Wednesday, 23 May 2012

Coffee and Orange Granitas in Chocolate Teardrops

Coffee and Orange Granitas in Chocolate Teardrops

adapted from Michel Roux


200 g good quality dark chocolate (70% cocoa solids)
200 ml freshly made coffee filter
15-25 gr caster sugar
 4 oranges, washed
60 gr caster sugar
acetate strip/ chocolate transfer sheet

Melt the chocolate in a heatproof bowl set over a pan of simmering water, making sure that the bottom of the bowl is not touching the water than remove from the pan.

To make the teardrops, cut 8 acetate strips, 20cm long and 4.5cm wide. Place the acetate strips on a chopping board or greaseproof paper and cover the whole surface with melted chocolate (if you are using chocolate transfer sheet, place it on the workstation with the textured side face up and the shiny side face down on the counter) and leave until beginning to set.

As the chocolate begin to set, take one strip and bend it, with the chocolate on the inside, to form a tear drop shape and set it on the sides(like the picture above). If it is necessary (depends on the acetate sheets you use) secure the ends together with a small paper clip(but be careful, if the paper clip is still new it can squeeze out the chocolate-therefore it is recommended to loosen it a bit). Repeat with the remaining chocolate-coated strips of acetate than refrigerate for at least 30 minutes to set or until ready to serve.

For the coffee granita, pour the filter coffee into a shallow freezer proof container dissolve the sugar(depending on your taste you should adjust the sugar- Michel Roux  used unsweetened coffee...but for me it was really bitter, I prefer my coffee with sugar and cream, therefore I put some sugar in it).Freeze it stirring  with a fork every 30 minutes, until little flakes begin to form.
This will take 2-3 hours.

For the orange granita, finely grate the zest from 2 oranges and squeeze the juice form all 4 oranges. Tip the orange juice into a bowl, add the sugar and leave to dissolve(without heating) for about 10 minutes, stirring occasionally. Stain throught a fine sieve and add the grated zest. Pour into a shallow container and freeze, as for the coffee granite(above).

When ready to serve, one by one, remove the paper clip and carefully peel off the acetate strip from each chocolate teardrop, placing it straight onto a chilled serving plate and allowing two teardrops per serving. Using a strong fork scrape shavings from the frozen granitas to fill the chocolate drops.
Serve immediately.

Hints and tips: 
- Ideally you shouldn't use your oven before serving (don't do the same mistake as me) as the teardops will  melt quickly
-Also for the reasons above I did one serving at the time avoiding the melting caused by the delay of acetate strips removals
-Even if you haven't used your oven, but you happen to be one of the lucky people who has proper warm weather and summer (not like me currently) than it is also a good tip to put your serving plates into the freezer for 5-10minutes before the plating so again helps you avoid the melting teardops effect
-Although the recipe recommended coffee and orange, but it is also the same principle with all the fruids and liquids, so if you fancy something else just be creative and let me know how you get on